Wallpaper can add style and personality to a room, but when it’s outdated, damaged, or simply no longer fits your design vision, removing it is often the first step toward a fresh new look. While wallpaper removal can seem daunting, with the right tools, techniques, and a little patience, homeowners can tackle this project successfully. This guide will walk you through how to remove wallpaper efficiently and safely.
Gather the Right Tools and Materials
Before starting, make sure you have all the necessary tools to make the process easier:
- Drop cloths or plastic sheeting to protect floors and furniture
- A wallpaper scraper or putty knife
- A scoring tool (optional, for stubborn wallpaper)
- Spray bottle or garden sprayer
- Hot water
- Wallpaper removal solution or a mixture of water and vinegar
- Sponges or rags
- Rubber gloves to protect your hands
Having everything ready ensures that you can work methodically without interruption.
Prepare the Room
Preparation is key to avoiding damage to your walls and furniture. Begin by removing all furniture from the room or moving it to the center and covering it with drop cloths. Protect your floors with a thick drop cloth or plastic sheeting.
Next, turn off power to the room and remove outlet and switch covers. Wallpaper near electrical outlets can be tricky, so make sure these areas are safely handled.
Identify the Type of Wallpaper
Knowing what type of wallpaper you’re dealing with will determine the removal method. There are generally three types:
- Peel-and-Stick or Non-Pasted Wallpaper: These types can usually be removed by peeling them off by hand.
- Pre-Pasted Wallpaper: The adhesive activates when wet, so spraying with water or a removal solution will loosen it.
- Traditional Wallpaper with Paste: These require more effort and often need scoring and a chemical or vinegar-based solution to remove the adhesive.
Identifying the type helps you avoid unnecessary effort and prevents damage to your walls.
Start with a Test Section
Choose a small area of wallpaper to test your removal method. This helps you understand how stubborn the adhesive is and whether additional tools or chemicals are needed. Score the wallpaper lightly if needed, then spray with hot water or removal solution and wait a few minutes.
Try peeling a corner gently with a scraper. If it comes off easily, you can continue using this method across the room. If it resists, you may need to apply more solution or use a scoring tool to allow the liquid to penetrate.
Remove the Wallpaper
For most wallpaper, follow these steps:
- Loosen the Adhesive: Spray the wallpaper generously with hot water or a commercial wallpaper remover. Let it soak for 10–15 minutes so the adhesive softens.
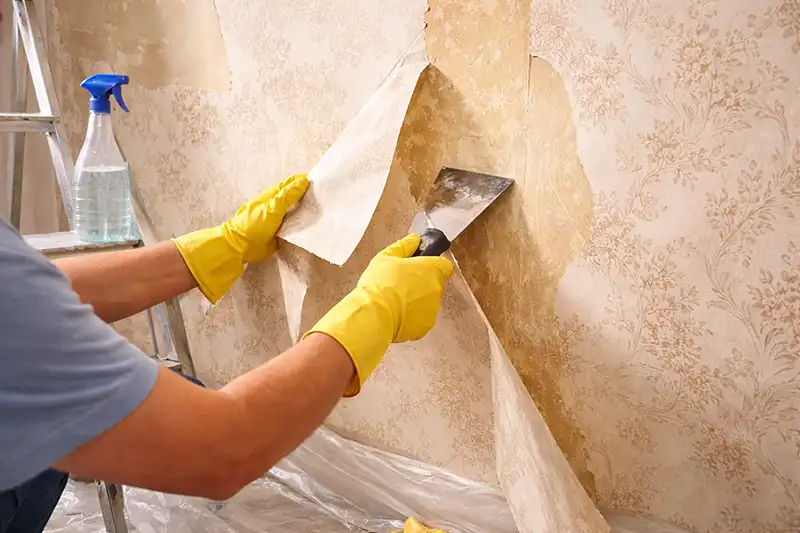
- Peel the Wallpaper: Start at a corner or seam and use your scraper to lift the paper. Work slowly to avoid gouging the wall.
- Continue in Sections: Work methodically across the wall, respraying areas as needed. Be patient—large walls may take several hours.
- Remove Residue: After the wallpaper is removed, adhesive residue may remain. Use a sponge and warm water to scrub it off. For stubborn spots, a mixture of warm water and vinegar can help dissolve adhesive.
Repair and Prep Walls
Once the wallpaper is gone, inspect the walls for damage. You may find small gouges, holes, or areas where the plaster or drywall needs patching. Use spackle or joint compound to fill imperfections, then sand smooth.
After repairs, wipe the walls with a damp cloth to remove dust and residue. Now your walls are ready for painting, new wallpaper, or other finishes.
Tips on How to Remove Wallpaper Easily
- Work in small sections to maintain control and reduce frustration.
- Keep a bucket of hot water or solution nearby for quick respraying.
- If the adhesive is particularly stubborn, consider using a wallpaper steamer for deep penetration.
- Always wear gloves to protect your hands from chemicals and prolonged water exposure.
When to Call a Professional
While many homeowners can remove wallpaper themselves, some situations may require professional help. If you encounter:
- Multiple layers of old wallpaper
- Severe wall damage
- Wallpaper that won’t budge after repeated attempts
A professional can ensure safe removal without damaging the underlying wall.
Conclusion
Removing wallpaper can be a labor-intensive project, but with preparation, patience, and the right tools, it’s entirely achievable for most homeowners. By following these steps, you can strip away outdated wallpaper, clean off adhesive, and prepare your walls for a fresh new look. Whether you plan to paint or apply new wallpaper, proper removal ensures a smooth, long-lasting finish.
With careful work, the process can be straightforward—and the results will transform your room, giving your home a refreshed, modern feel.