Learning how to paint baseboards is one of the easiest ways to refresh a room and give it a crisp, polished appearance. Over time, baseboards can become scuffed, chipped, or discolored from everyday wear and tear. A fresh coat of paint can instantly brighten the space and make your walls and floors look cleaner and more finished. While painting baseboards may seem like a small project, taking the time to prepare properly and use the right techniques will help you achieve professional-looking results. This guide will walk you through the process step by step.
Gather Your Materials
Before starting, make sure you have the tools and supplies needed to complete the project smoothly. Common materials include:
- Painter’s tape
- Drop cloths or plastic sheeting
- A small angled paintbrush (1½–2 inches)
- Sandpaper or sanding sponge
- Wood filler or spackle
- Primer (if needed)
- Semi-gloss or gloss trim paint
- Damp cloth or sponge
Using quality tools and paint will make the process easier and produce a cleaner finish.
Prepare the Area
Preparation is one of the most important steps when painting baseboards. Start by removing furniture or moving it away from the walls so you have plenty of space to work. Lay drop cloths or plastic sheeting along the floor to protect it from paint drips.
Next, apply painter’s tape along the top edge of the baseboards where they meet the wall. You can also tape along the edge of the flooring if you want extra protection. Proper taping helps create clean, sharp lines and prevents paint from getting onto surfaces you don’t want to paint.
Clean the Baseboards
Baseboards tend to collect dust, dirt, and grease over time. Painting over these contaminants can prevent paint from adhering properly.
Use a damp cloth or sponge with mild soap and water to wipe down the baseboards thoroughly. Pay special attention to corners and areas near doors where buildup is common. After cleaning, allow the baseboards to dry completely before moving on to the next step.
Repair Any Damage
Before painting, inspect the baseboards for dents, nail holes, or cracks. Small imperfections can be filled with wood filler or spackle.
Apply the filler with a putty knife, allow it to dry according to the manufacturer’s instructions, and then sand the area smooth. This step ensures your finished paint job looks smooth and professional rather than uneven or patched.
Lightly Sand the Surface
Light sanding helps the new paint adhere better to the surface. Use fine-grit sandpaper or a sanding sponge to gently scuff the baseboards. This removes any glossy finish and smooths out rough areas.
After sanding, wipe the baseboards again with a clean cloth to remove dust. Dust left on the surface can create bumps in the paint finish.
Apply Primer if Needed
If your baseboards are stained, heavily scuffed, or changing from a dark color to a lighter one, applying a primer can improve coverage and durability.
Primer helps the paint bond better and can reduce the number of coats required. Allow the primer to dry fully before applying paint.
Paint the Baseboards
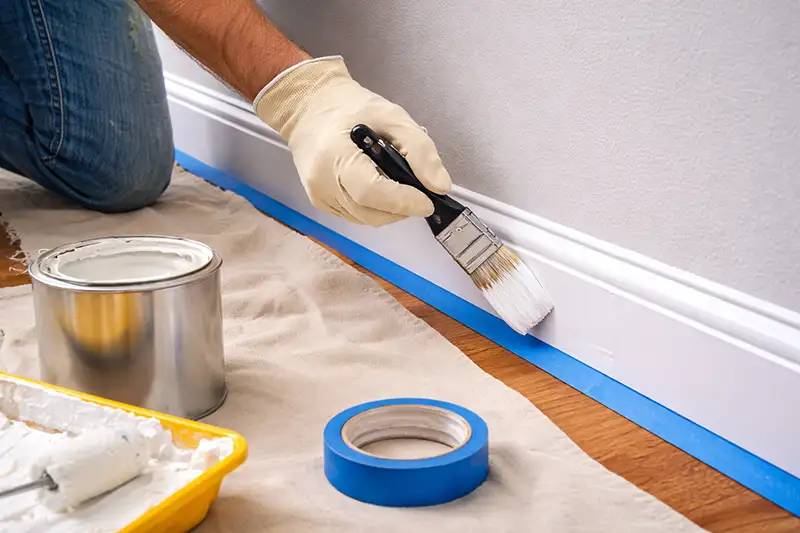
When painting baseboards, a small angled brush gives you the best control. Dip the brush lightly into the paint and remove excess paint on the rim of the container.
Start at one end of the room and work your way along the baseboard in smooth, steady strokes. Follow the natural length of the trim for the best results.
Semi-gloss or gloss paint is typically recommended for baseboards because it is durable, easy to clean, and resistant to scuffs.
Avoid applying too much paint at once, as this can cause drips. Thin, even coats produce a smoother finish.
Apply Additional Coats
Most baseboards require at least two coats of paint for full coverage. Allow the first coat to dry completely before applying the second.
Check for missed spots or uneven areas and touch them up as needed. Patience during this step will help you achieve a uniform, professional look.
Remove the Tape Carefully
Once the final coat has dried slightly but is not fully hardened, carefully remove the painter’s tape. Pull the tape away slowly at a 45-degree angle to prevent peeling or lifting the fresh paint.
Removing the tape at the right time helps create clean, sharp edges along the wall and floor.
Final Touches
After removing the tape, inspect the baseboards for any small imperfections. Minor touch-ups can be done with a small brush.
Once everything is dry, move furniture back into place and enjoy the refreshed appearance of your room.
Final Thoughts
Learning how to paint baseboards is a simple home improvement skill that can dramatically improve the look of any space. With proper preparation, the right tools, and careful technique, you can achieve clean lines and a durable finish that enhances the overall appearance of your room.
Whether you’re refreshing a single room or updating your entire home, freshly painted baseboards provide the finishing touch that makes your walls, floors, and décor stand out.